Depending on the security settings at your organization, you may need Administrator rights to proceed.
| 1. Run the installation program. An introductory screen will appear. Press Next. |  |
| 2. The license screen will appear. Read the license agreement. If you accept, select the I accept the agreement radio button and press Next. |  |
| 3. Read and accept the Privacy Policy. Press Next. |  |
| 4. The following window will appear. Select Standalone license. Press Next. |  |
| 5. If you wish to install FCS Express in a folder other than the default location, specify the preferred location by pressing Browse. Press Next. |  |
| 6. If you have previously installed FCS Express on this computer, you may see this message. Press Yes to continue with the installation and overwrite the previous installation. |  |
| 7. Confirm the destination location and press Install. | 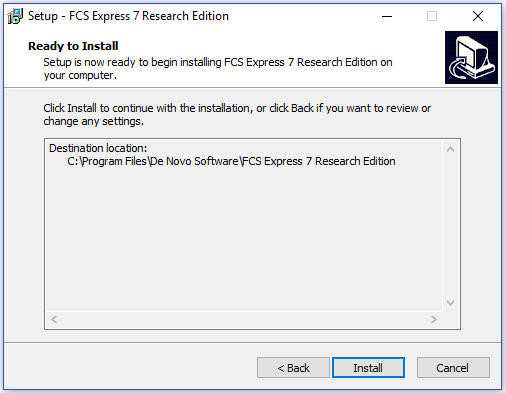 |
| 8. At the completion of install, press Finish to exit setup. |  |
Depending on your operating system and computer configuration, you may require administrative access in order to install FCS Express.
It is important that if you are installing as an Administrator, but are going to be using FCS Express as a non-administrator, you should run FCS Express the first time as the non-administrator. Running FCS Express the first time as an Administrator will create certain files that the non-administrator will need to modify, but Windows will not allow the non-administrator to do so because the Administrator owns the file.
In short, run the installation program as the administrator if required, but do not run it as the administrator unless you will always be running as administrator.
| 1. Double-click the downloaded DMG installer to open the folder. Then, drag the FCS Express 7 logo over the Applications folder shortcut | 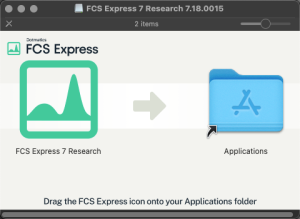 |
| 2. If this is updating a previous installation, select the option to Replace. |  |
| 3. A progress window should appear. | 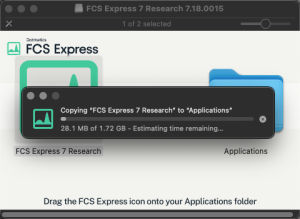 |
| 4. After installation is complete, navigate to the Applications folder and launch FCS Express. |  |
| 5. Confirm that the application can be opened by clicking Open. | 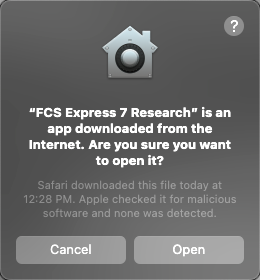 |
| 6. A message will appear stating “Finished updating FCS Express to 7.20.00XX”. Relaunch FCS Express from the Applications folder. | 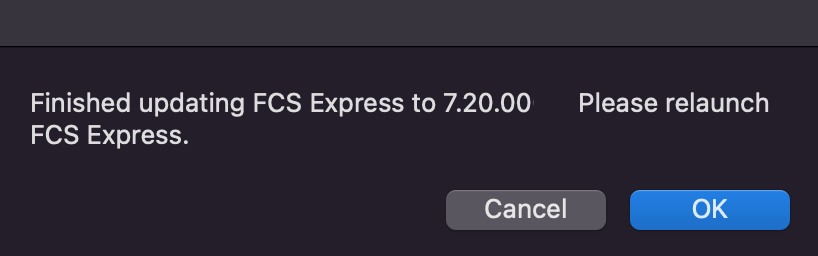 |
| 7. On the initial installation of FCS Express on a Mac, macOS will require security permission to allow FCS Express Full Disk Access. The purpose of this is so that the application can browse a folder that might contain an FCS Express Layout or data needed by the user. Click OK. | 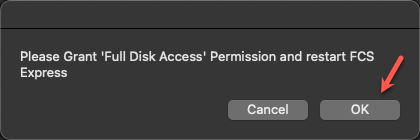 |
| 8. The Full Disk Access permission should appear. Grant this permission by enabling the option for FCS Express. Please find the instructions for your particular macOS below | |
| macOS 10, 11 and 12 | |
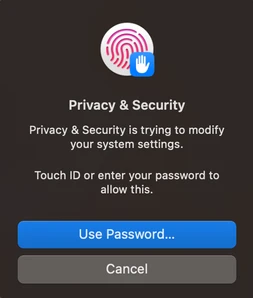
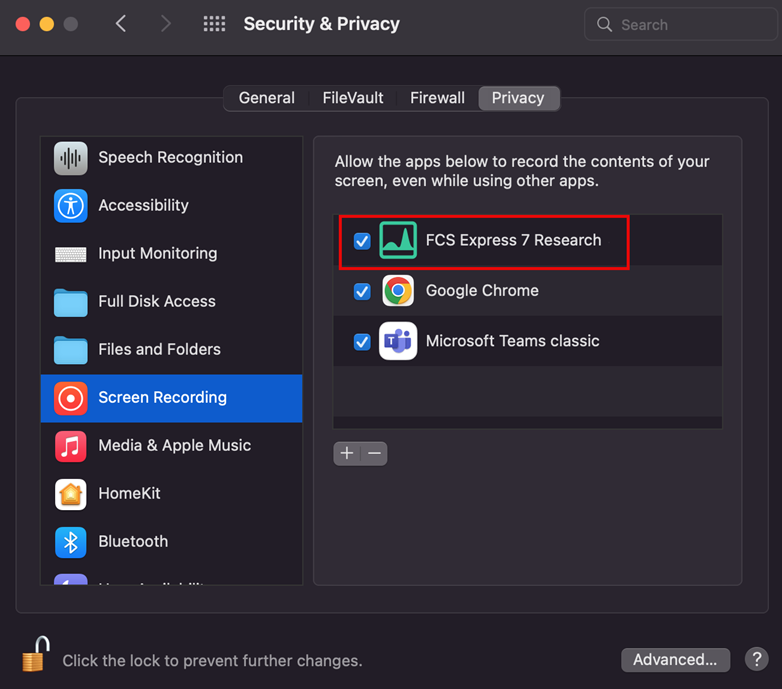
| 8.1) Click the Unlock Button 8.2) Enter your username password if prompted 8.3) Check the checkbox for FCS Express | 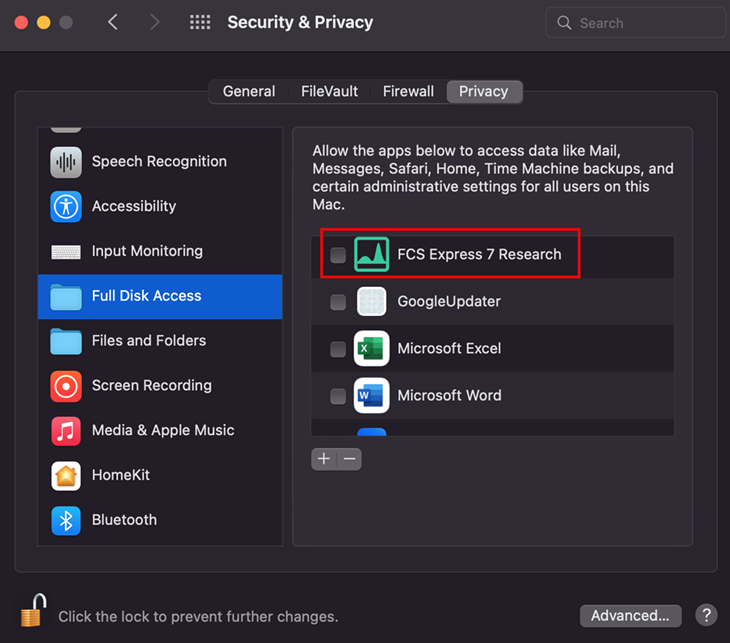 |
| macOS 13 and 14 | |
| 8.1) Press the slider for FCS Express. 8.2) Authenticate your identity with macOS | 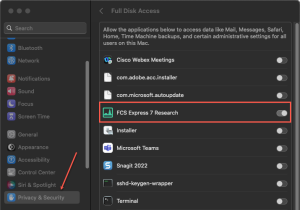
 |
| 9. Relaunch FCS Express from the Applications folder. | |
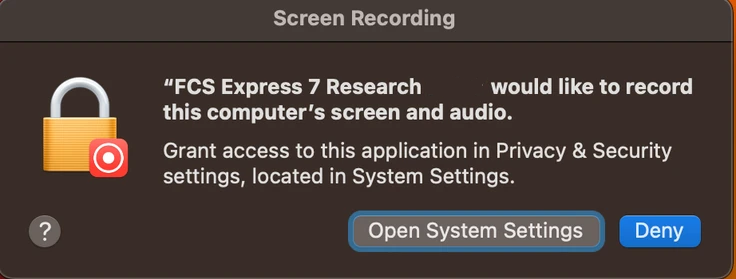
| 10. FCS Express will request screen recording permission. FCS Express will take a screenshot of itself in the event of a crash to attach to a bug report. Please find the instructions for your particular macOS below. | |
| macOS: 10, 11 and 12 | |
| 10.1) Press “Open System Settings”. If you press Deny you will be asked again in 30 days. 10.2) Click the Unlock button. 10.3) Enter your username password if prompted. 10.4) Check the checkbox for FCS Express. |
 |
| macOS: 13 and 14 | |
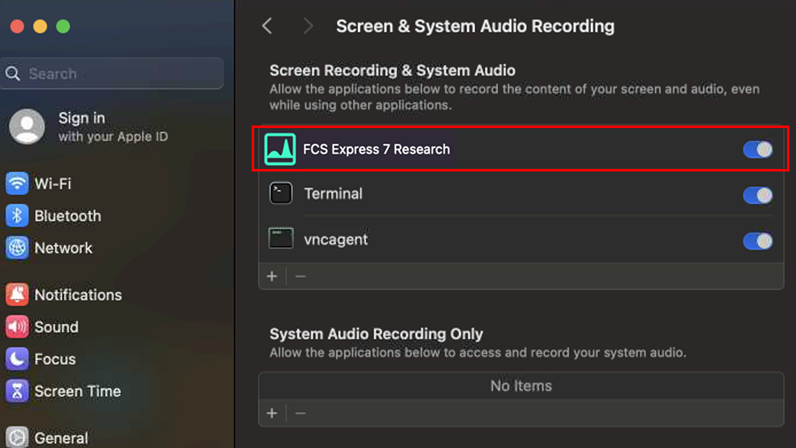
| 10.1) Press “Open System Settings”. If you press Deny you will be asked again in 30 days. 10.2) Press the slider next to the FCS Express icon. 10.3) Authenticate your identity with macOS. |
|
| 11. Launch FCS Express again. | |
| 12. If this is the initial installation of FCS Express on a Mac, the Configuration File Setup Wizard should appear. Proceed to the next section to configure FCS Express on your computer. | 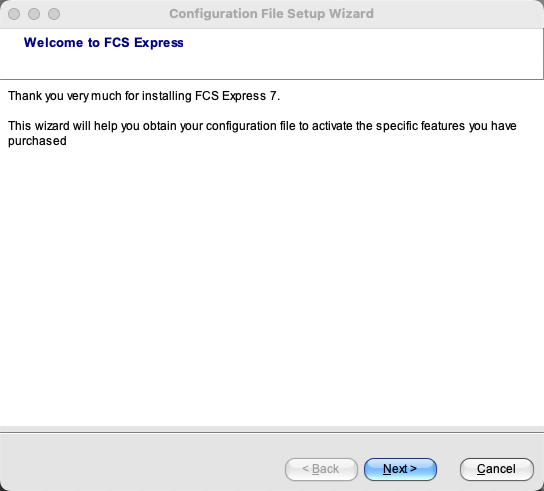 |
| 1. Run the installation program. Press Next on the introductory screen. These instructions make the assumption that FCS Express is being installed from a client computer to an app server or file share. However, a network license for FCS Express can be installed directly on the app server/file share if direct access is possible. If direct access is possible, the Standalone for PC instructions apply in this situation. |  |
| 2. The license screen will appear. Read the license agreement. If you accept, select the I accept the agreement radio button and press Next. | |
| 3. Read and accept the Privacy Policy. Press Next. | |
| 4. Choose the Network license radio button. Press Next. |  |
| 5. Click the Browse button to select the folder in which you wish to install FCS Express. This should be the folder on the shared drive where everyone will be able to access FCS Express. FCS Express Network should NOT be directly installed on an individual user’s computer. Press Next. |  |
| 6. Review your installation settings. Press Install. FCS Express will now be installed on your computer. This may take a few minutes. |  |
| 7. FCS Express Network should not be directly installed on an individual user’s computer. The application is accessed through a shortcut to FCS Express.exe that resides in the installation folder on the file share. To facilitate this, a shortcut to FCS Express.exe can be created and left within the installation folder and dragged onto the desktop of a workstation that has access to the server on which FCS Express is installed. It is through this shortcut that the application will be launched from a connected workstation. Even though FCS Express resides within the central location, the application is launched and run using the resources of the local client, not the server/file share. | |
| 8. The updating of an existing network license follows these same installation steps. The main difference is that the folder specified in Step 5 needs to specify the pathway for the root folder in which the application is currently installed. For example, if your application is installed at X:InstallationsFCS Express 7 Flow Clinical Edition, the installer can be pointed to X:Installations. You can enter the UNC pathway or click the Browse button to navigate to the root folder. If the proper network folder is specified in the pathway, FCS Express will automatically update the application files within that folder. A network license is only compatible with Windows platforms. | |
How do I run 32-bit and 64-bit versions of the software for the same network license?
Where can I find more information about the Network Version Architecture?| 1.When FCS Express starts , it will detect whether or not a configuration file is present. If one does not exist, the Configuration File Setup Wizard will automatically appear. Press Next to continue. |  |
| 2. If you already have an account with De Novo Software, choose the first option. If you have already received a configuration file, choose the second option. Press Next to continue. |  |
| 3. If you chose the first option above, the next page will prompt you to enter your email address and the password you entered on the De Novo Software web site when you registered.If this is for a purchased copy, make sure to log in using the e-mail address of account that the purchased copy is registered to. If you do not remember your password, enter your email address and press the I Forgot My Password button. Press Next to continue. |  |
| 4. Choose the configuration for your demo or active subscription from the list of available licenses. Press Next to continue. | 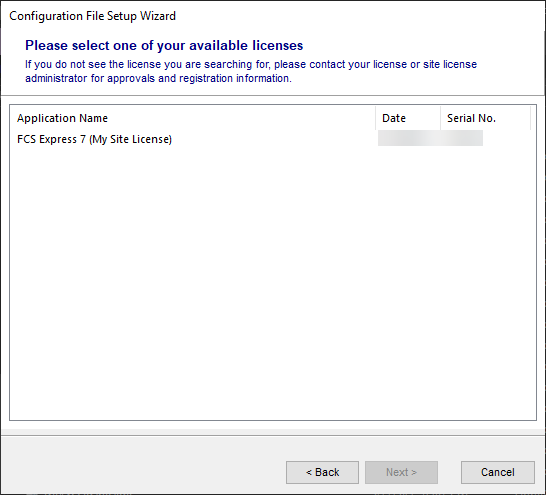 |
| 5. The configuration process is now complete. Press Finish to launch FCS Express. |  |
| 1.When FCS Express starts, it will detect whether or not a configuration file is present. If one does not exist, the Configuration File Setup Wizard will automatically appear. Press Next to continue. | |
| 2. Choose the 2nd option, Using a configuration file I already received Press Next to continue. | 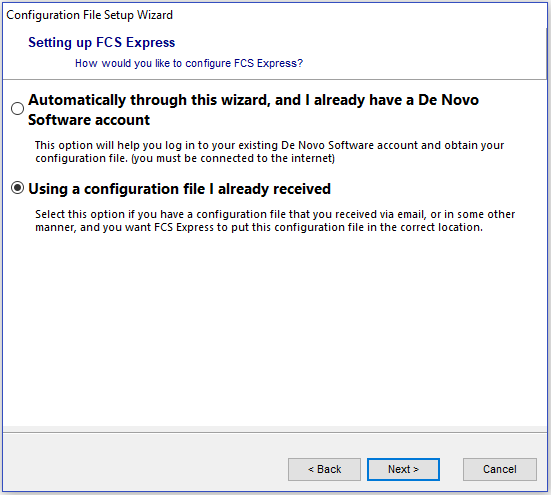 |
| 3. Click the folder icon to browse and select the configuration file that was provided to you. After locating and selecting the configuration file that you would like to use, click Next. | 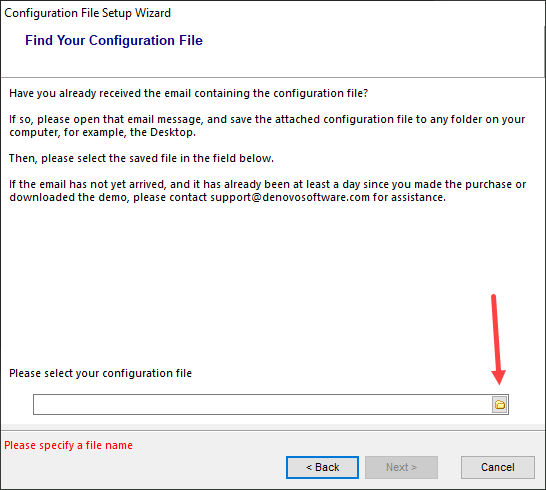 |
| 4. FCS Express has now copied the configuration file to the correct location. Press Finish to finish the configuration of FCS Express and to launch the application. | |
| 1. Launch your demo of FCS Express. If there is a message about the number of days left in your trial, click Continue. Log into FCS Express and open a New Layout, then go to File > System > Configure your Purchase. |  |
| 2. In the window confirming whether you would like to upgrade your config file, click Yes. | 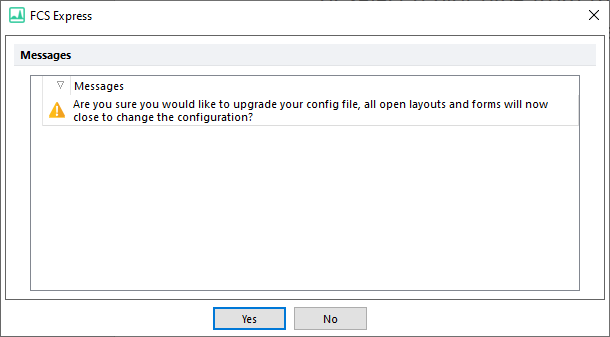 |
| 3. The Configuration File Setup Wizard will appear. Press Next to continue. | 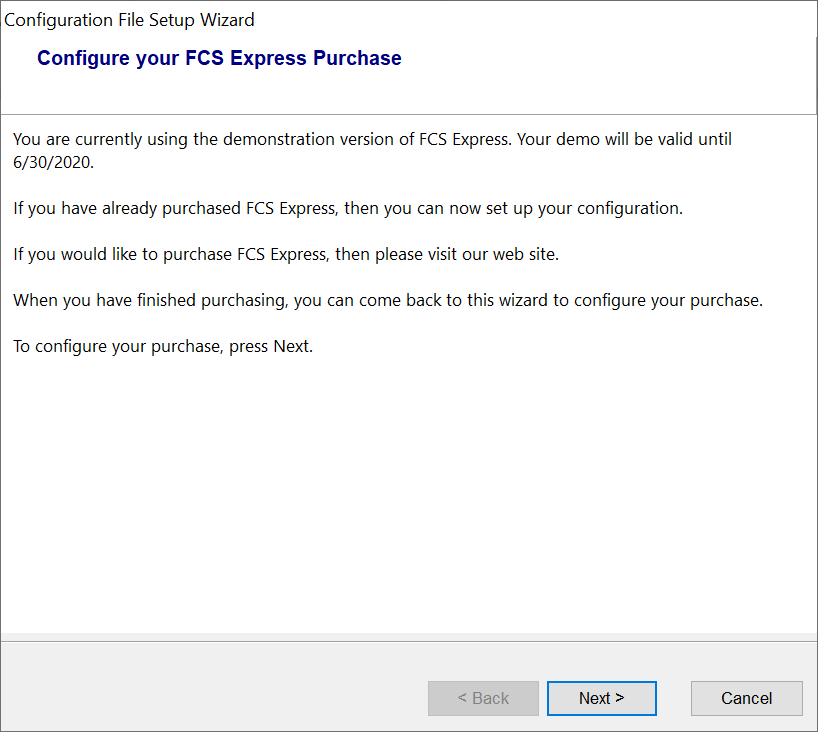 |
| 4. The next page will prompt you to enter your email address and the password you entered on the De Novo Software website when you registered. Since this is for a purchased copy, make sure to log in using the e-mail address of the account that is registered with the purchased license. If you do not remember your password, enter your email address and press the I Forgot My Password button. Press Next to continue. | |
| 5. Choose the configuration for your purchase from the list of available licenses. Press Next to continue. | |
| 6. The configuration process is now complete. Press Finish to launch FCS Express. | 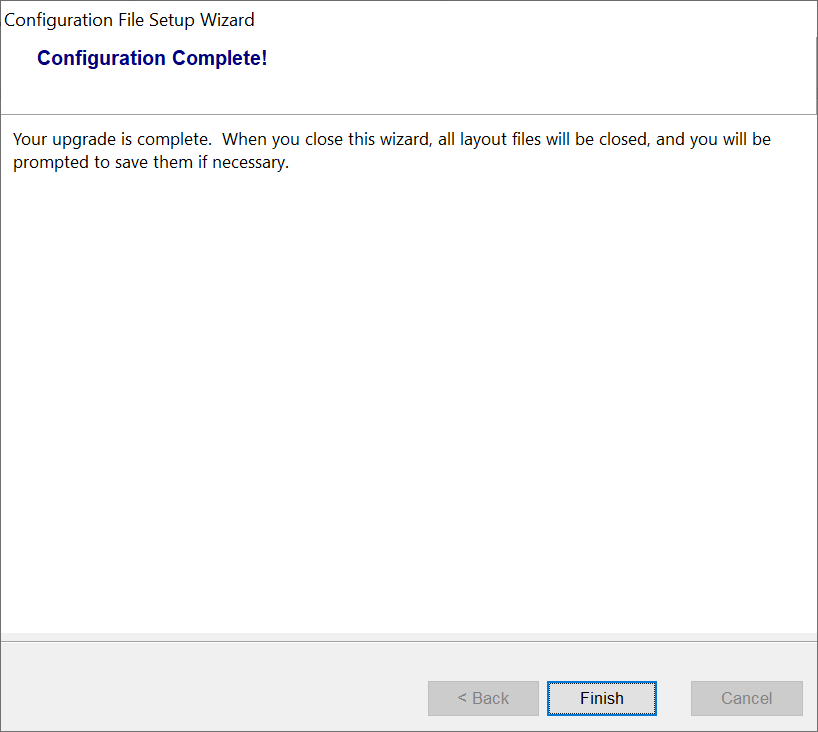 |
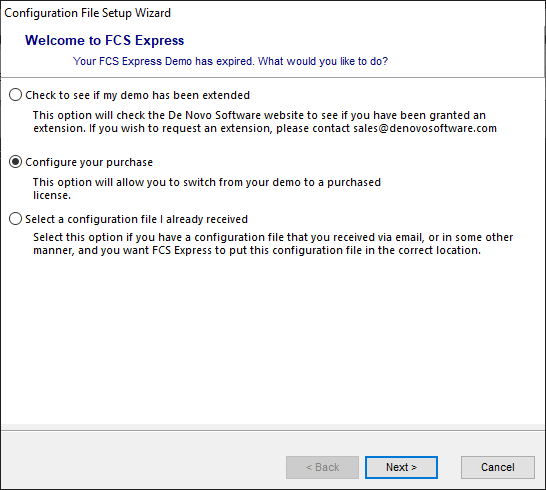
1. If your demo of FCS Express has expired, you will be prompted with 3 options when opening FCS Express:
|
 |
| 2. The next page will prompt you to enter your email address and the password you entered on the De Novo Software website when you registered. Since this is for your purchased copy, make sure to log in using the e-mail address of the account that the purchased copy is registered to. If you do not remember your password, enter your email address and press the I Forgot My Password button. Press Next to continue. | |
| 3. Choose the configuration for your purchase from the list of available licenses. Press Next to continue. | |
| 4. The configuration process is now complete. Press Finish to launch FCS Express. | 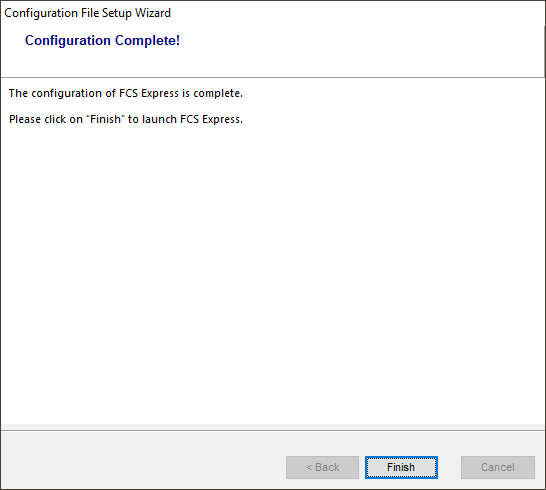 |
| 1. Within FCS Express, go to File > System > Change your configuration. | 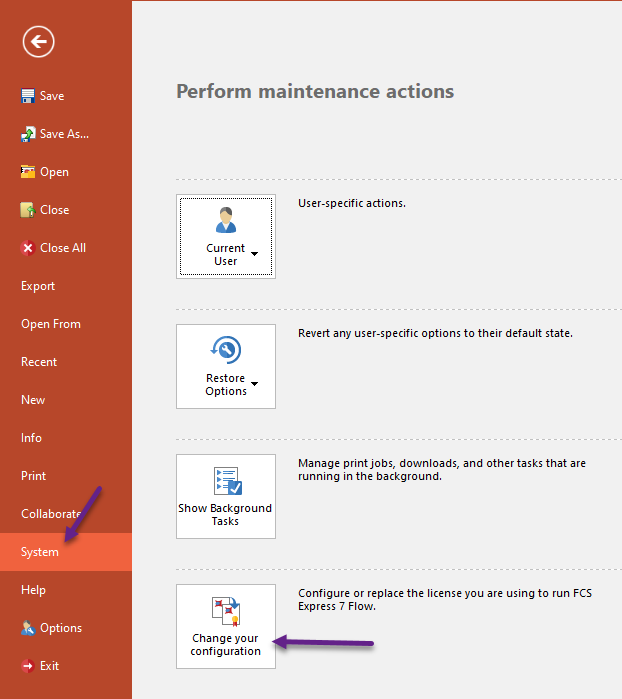 |
| 2. A warning message window will appear. To continue with changing your configuration file click on Yes. To save any open analysis workspaces, layouts, or forms before proceeding with changing your configuration click No. | 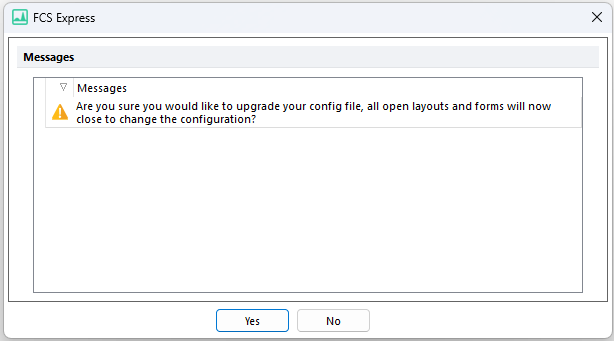 |
| 3. Proceed through the Configuration File Setup Wizard by clicking the Next button. | 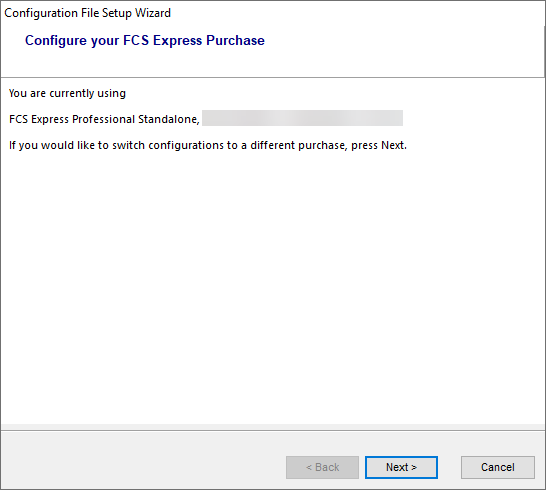 |
| 4. Select the option Automatically through this wizard…. and click Next. | 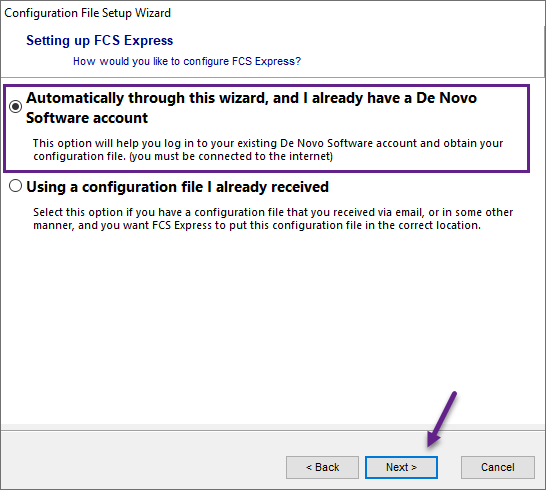 |
| 5. Enter your De Novo Software account email address and password. | |
| 6. Select the appropriate license and then click Next. | 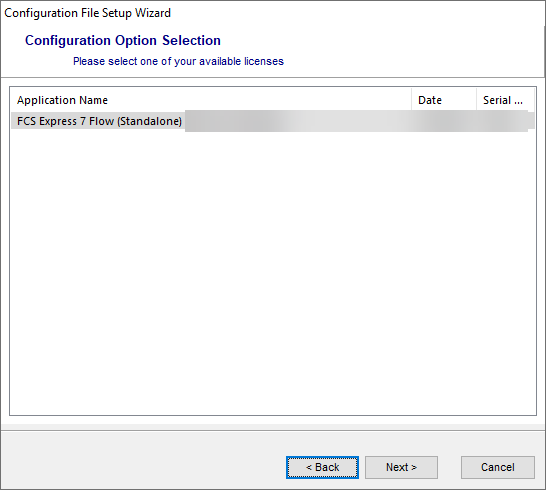 |
| 7. Click Finish to complete the process. |
Countercodes are a licensing option that you have when using FCS Express. For a detailed description of the countercode, please click here.
A countercode is not required for 45 days after purchase. De Novo Software will only issue a countercode once we have received payment for your purchase. If you purchased using a credit card, your purchase will be approved as soon as the credit card payment is processed, which is typically as soon as we enter the order into our system.
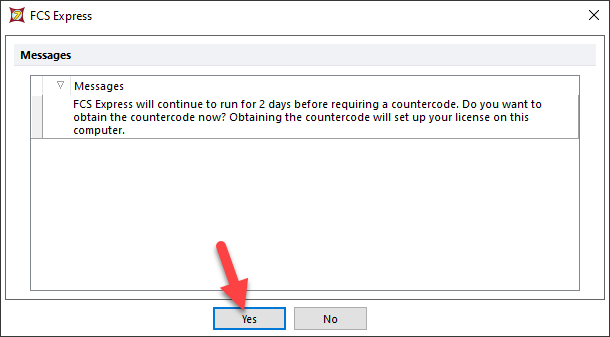
After 45 days, the software will not run unless a countercode has been entered. Please follow the procedure described below in order to obtain the countercode. Remember that the countercode will lock that copy of FCS Express to a particular computer, so be sure only to request a countercode for the computer that you want to use FCS Express on.
If you wish to obtain a countercode before the 45 days are over, you can do so by selecting System->Enter Countercode from the File tab. The wizards shown below will guide you through the process.
The wizard is the simplest way to obtain your countercode. To use this method, the computer you are setting up the countercode for must be connected to the internet. You must also be the Owner of this countercode license or the countercode license has officially been shared with you.
Instructions for how a countercode license can be shared with other users can be found here.
| 1. Start FCS Express. The Countercode Wizard will appear. |  |
| 2. Select Configure countercode automatically. | |
| 3. Press Next. | |
4. Enter your email address and the password you entered on the De Novo Software web site when you registered. Press Next to continue.If this is for a purchased copy, make sure to log in using the e-mail address of account that the purchased copy is registered to. If you do not remember your password, enter your email address and press the I Forgot My Password button. |  |
| 5. Your countercode has now been successfully obtained. Press Finish to continue and start FCS Express |  |
 Clicking Yes within this window will lead you to Step 1 of this procedure.
The Manual option allows you to obtain your countercode if you are not connected to the internet. You can follow these instructions to both obtain your machine-specific code, and enter your machine-specific countercode.
Clicking Yes within this window will lead you to Step 1 of this procedure.
The Manual option allows you to obtain your countercode if you are not connected to the internet. You can follow these instructions to both obtain your machine-specific code, and enter your machine-specific countercode.
| 1. Start FCS Express. The Countercode Configuration Wizard will appear. | 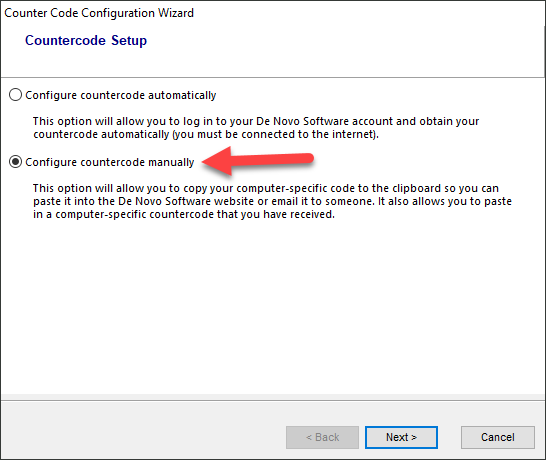 |
| 2. Select Configure countercode manually. | |
| 3. Press Next. | |
| 4. Click the Copy Code to Clipboard button. | 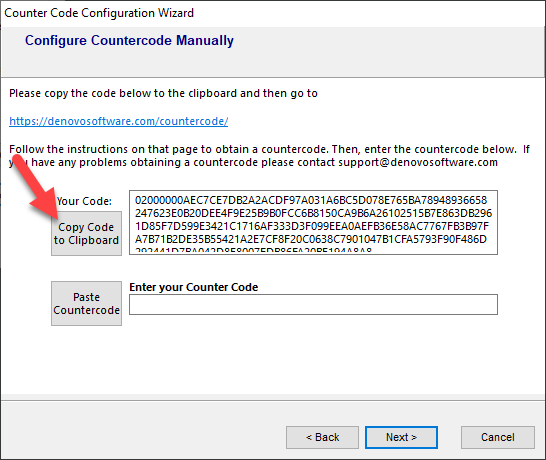 |
| 5. Click on the link on the screen or click here to go to the countercode page on the De Novo Software website. | |
| 6. In the field, paste the code that you copied in Step 4, then click Get Countercode. If attempting to obtain a countercode for an FCS Express Version 4 license, select the appropriate option and enter your name and email address. | 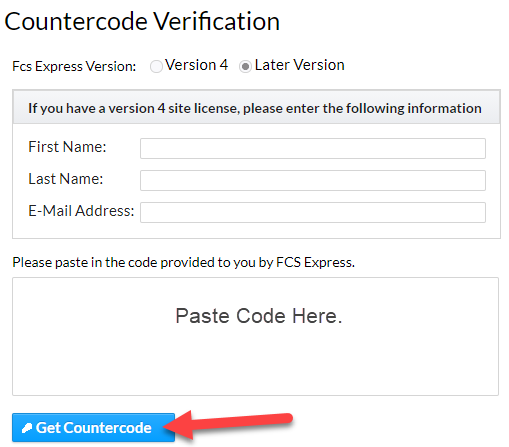 |
| 7. Confirm that you want to obtain the countercode. | 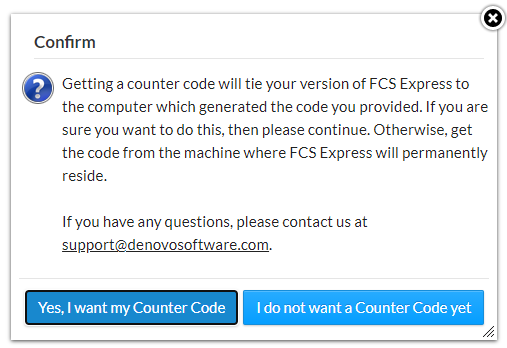 |
| 8. The countercode will be emailed to the registered end-user of the license. | |
| 9. Copy the countercode from the email and paste it into the appropriate field in the Countercode Wizard. | 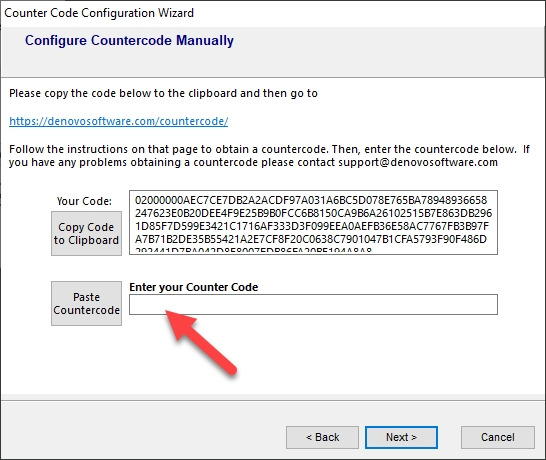 |
| 10. Click Next, then click Finish. | 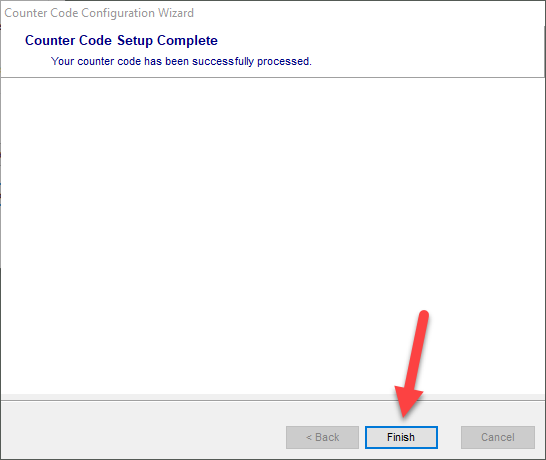 |
| 11. If you do not have access to the email that was sent to the license owner that contains the countercode, please email the code that FCS Express provided to you in Step 5 to support@denovosoftware.com. | |